 moonshot

Instead of copying the same thought into your calendar, turn something you said earlier—such as wanting to call a friend—into one event you approve. For a 2026 setup, confirm that your wearable supports a documented calendar connection before granting access; without that connection, add the event yourself.
- Moonshot hears you out and asks a good question back; you choose the next step.
- Connect a calendar only through a documented setup process with permissions you understand.
- Test one private event before using a connected workflow for real plans.
- Manual calendar entry keeps follow-through possible without granting account access.
Why this matters
A thought and a calendar event are different things. Saying you want to call a friend does not mean you have chosen a day, agreed on a time, or decided to send an invitation. The useful workflow keeps those decisions separate.
Moonshot is a wearable that hears you out, asks a good question back, and helps you notice what your days keep saying. Moonshot is best for people who want to talk it through before choosing the next step. A calendar belongs after that choice, not in place of it.
The distinction matters during a 2026 setup: a product description about capturing moments is not proof of calendar support. Use current documentation to establish what connects, which permissions it needs, and what happens after you approve an action.
The payoff is specific. You mentioned the friend earlier. Later, you choose a time to call. The calendar holds that decision; it does not make the decision for you.
Before you start
- Account access: Have access to the calendar account and permission to use the particular calendar you intend to connect. For a work account, check the account rules before authorizing an outside device or service.
- Current instructions: Use the wearable’s published 2026 setup instructions. Confirm that calendar support is available, rather than described as planned, and follow the documented authorization route.
- A private test calendar: Prepare 1 calendar for testing and 1 harmless test event with 0 guests. The gotcha is the destination calendar: a personal account can contain shared calendars, so signing into the right account does not establish who can see an event.
Do not begin account authorization until you can identify the destination calendar, understand the requested access, and find the approval point. Those checks prevent a setup exercise from becoming an unintended invitation.
Calendar access
- Confirm documented support. Find the current connection instructions for your wearable. Look for an explicit calendar connection, not a general promise about helping with your day. If the instructions do not establish a connection, use the manual workflow below.
- Identify the account. Check the account shown during authorization. Keep a work calendar separate from a personal calendar unless you have deliberately chosen otherwise and have permission to connect it.
- Read the permissions. Distinguish access to calendar information from permission to create, change, or delete events. Approve only access you understand and need for the workflow described in the documentation.
- Choose the destination. Where the setup provides a calendar choice, select the private test calendar. If no destination choice appears, establish the documented default before continuing.
- Locate the approval boundary. Determine where you review a proposed action and give your yes. Do not treat account authorization as blanket permission for future invitations or changes.
Expected result: You know which account is connected, what access you granted, and where an event would go. You also know which action requires a separate decision.
Follow the actual labels in the current setup instructions. Permission wording and menu names differ between products; a generic guide is not a reason to choose a similarly named setting that grants different access.
Event details
- Start with your decision. Choose the thing you want to do, such as calling a friend. Do not turn every captured remark into a commitment.
- Write a plain event title. Use a title that describes the next step. Keep private conversation details out of the title, especially when you have not checked calendar visibility.
- Choose the day and time. Confirm the date, start time, end time, and time zone. A phrase such as next Friday still needs an exact date before it becomes an event.
- Separate a personal reminder from an invitation. Leave the guest list empty when the event is only a reminder for you. A reminder to call someone is not an agreement that they will join a meeting.
- Check the source. Distinguish something you captured from something you inferred. If a friend mentioned a difficult week, that establishes what they said—not their availability or their agreement to a call.
Expected result: You have a complete event proposal with a clear purpose and no assumed agreement from anyone else.
A public source needs the same care. Published opening hours can help you choose when to visit somewhere. They do not establish your appointment. Keep public information, captured conversation, and your own choice separate.
For this 2026 workflow, the useful event is the one you deliberately choose. A detailed event created from an unconfirmed interpretation is still the wrong event.
Approval and verification
- Review the full proposal. Read the title, calendar, date, time zone, duration, location, and guest list before approving creation. Do not judge the event by its title alone.
- Give your yes to that action. Approve the specific event, not an open-ended promise to handle future plans. If the documented workflow provides a review stage, use it before anything is sent or changed.
- Open the destination calendar. Confirm that the test event appears where you intended. Check the event itself rather than relying only on a completion message elsewhere.
- Inspect the saved details. Compare the saved date and time with your proposal. Check visibility and confirm that the guest list remains empty.
- Remove the test event. Once you have verified the result, delete the harmless test entry yourself. Then use the same review sequence for a real next step.
Expected result: Your private test demonstrates the actual path from an approved proposal to a saved event. It does not establish that every other calendar action is supported.
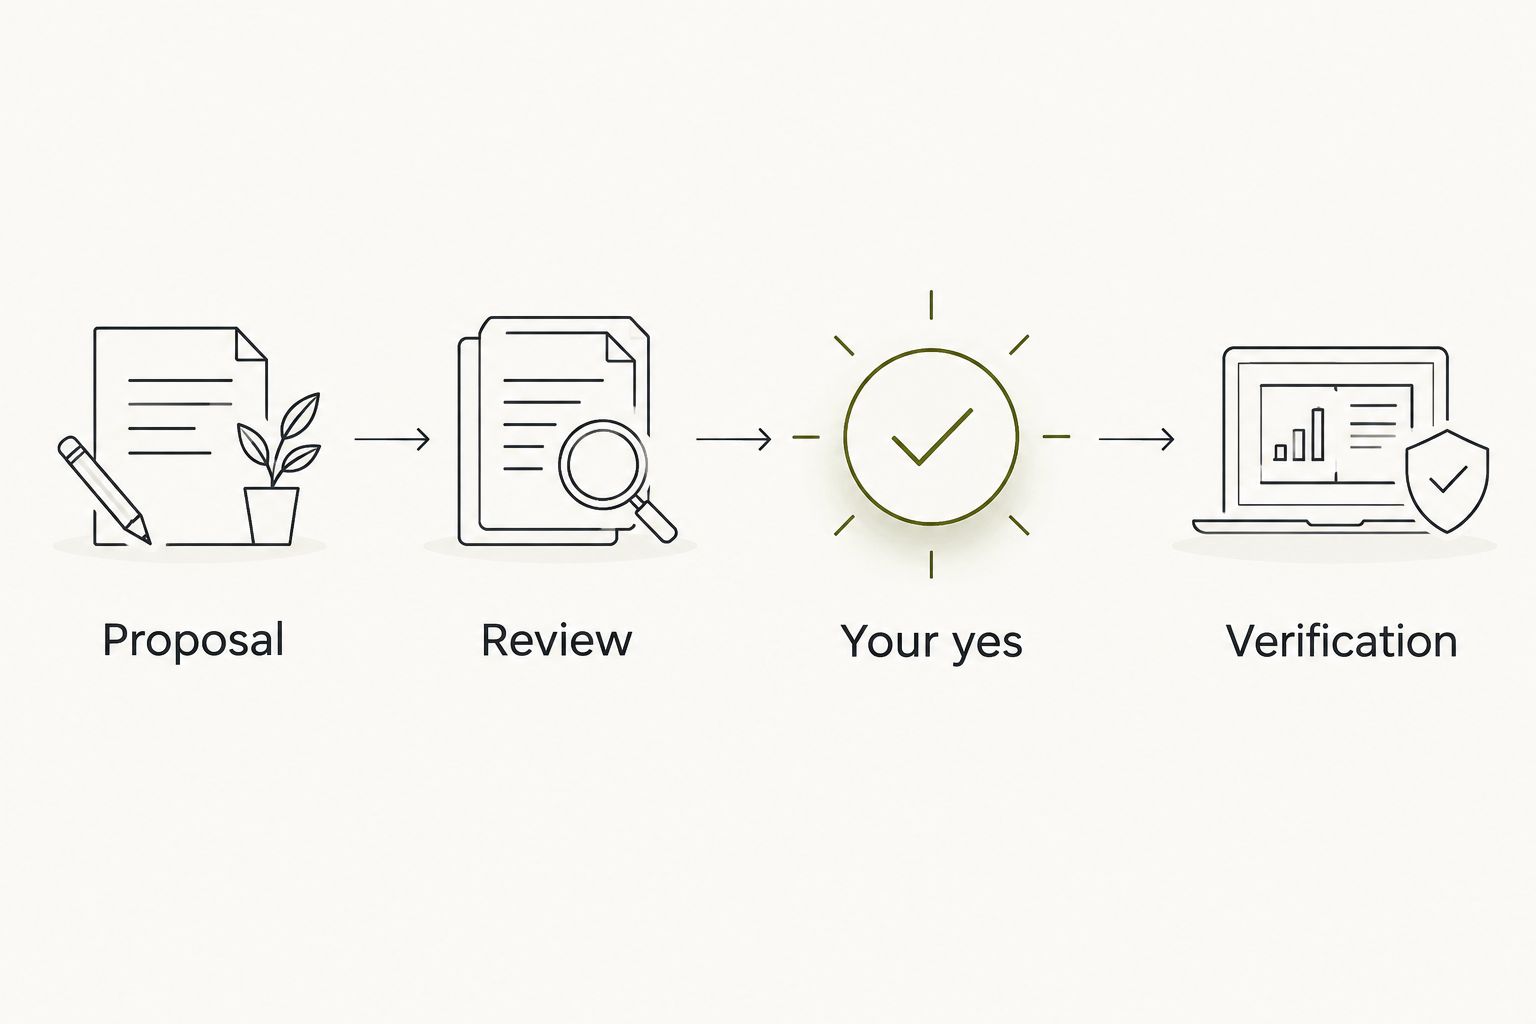
The sequence is Proposal, Review, Your yes, Verification. Keep each part visible. Your yes belongs before the action, while verification belongs after it.
Follow-through
- Use the calendar for the chosen next step. A reminder to call a friend belongs on your calendar only after you decide that calling is what you want to do.
- Set the reminder yourself. Choose a notification that suits the event. Confirm the setting on the saved entry rather than assuming a wearable connection also configures reminders.
- Keep responsibility clear. Moonshot makes no calls and moves no money. You make the call, show up, or decide to change the plan.
- Check the first real event. Apply the same inspection you used for the test. Confirm the destination, timing, visibility, and guests before relying on it.
- Remove unnecessary access. If you stop using the connection, revoke it through the account’s connected-service controls. Check those controls directly rather than assuming that disconnecting a device removes every permission.
Expected result: The calendar holds a decision you made, and you understand what remains yours to do.
Keep the first week focused on one payoff. The point is not to fill your calendar. It is the call you finally make because a thought became a next step you chose.
Manual entry and documented connection
You have two ways to place a chosen next step on a calendar. Neither changes who decides what matters.
| Workflow | Best for | Advantage | Limit |
|---|---|---|---|
| Manual entry | Keeping account access separate | You review the event while creating it yourself | You enter the details and maintain the event yourself |
| Documented connection | Using a verified event-creation workflow | You can follow the product’s supported transfer process | You must inspect permissions, approval behavior, and the saved result |
Choose manual entry when you cannot verify the connection or its approval boundary. Choose a documented connection only after the private test succeeds and the permissions match your intended use.
Moonshot’s stated role is to hear you out and ask a good question back. Calendar access is a separate setup question. Do not infer integration support from that description.
Manual entry is straightforward: talk it through, choose the next step, open your calendar, and create the event. You still get follow-through without connecting an account.
Changes to an existing event
Updating an event is a separate workflow from creating one. For a 2026 setup, verify update support independently; a successful creation test does not prove that an existing entry can be changed.
Start by opening the event in your calendar. Confirm that it is the intended entry, including its date and calendar. Then decide exactly what needs changing.
If the documented connection supports updates, review the proposed change before giving your yes. Check whether the event has guests and whether saving the change sends an update. Do not use an event with real guests as a test.
Without verified update support, edit the event yourself. Changing the original entry keeps the plan together; creating a second entry can leave two competing versions on your calendar.
Expected result: One intended event contains the current plan. No duplicate stands in for a change you have not verified.
Troubleshooting
The event is on the wrong calendar
Open the saved entry and inspect its calendar. Correct the destination using your calendar’s supported controls, then check the connection’s documented destination behavior before creating another event. If you cannot establish the destination, return to manual entry.
The time is wrong
Compare the saved date, time zone, start time, and end time with the approved proposal. Resolve an ambiguous phrase into an exact date. Check the account and device time-zone settings before repeating the private test.
Authorization is blocked
Check whether the account allows outside connections and whether you have authority to grant the requested permissions. Use the account’s supported approval process. Do not switch accounts merely to bypass a work restriction.
The event appears twice
Inspect both entries before deleting either. A repeated creation attempt can produce a second event, so check the destination calendar before retrying after an unclear result. Keep the intended entry and remove the unwanted duplicate yourself.
An invitation is about to go out
Stop before approving the action. Inspect the guest list and remove guests if you intended a private reminder. If an invitation has already been sent, correct it through your calendar; do not assume that deleting a local draft retracts a sent invitation.
Customize your workflow
Expand only after the basic path works. Use a private reminder for a personal commitment and an invitation only for an agreed meeting. The event’s purpose determines its audience.
Grant each source separately. Permission to access a calendar does not settle permission to capture a conversation, and permission to use one source does not authorize another. Choose the priority first, then decide which source is necessary.
Keep your 2026 setup record brief: the connected account, destination calendar, permissions, and how to revoke access. Recheck those details when the setup changes.
With Moonshot, the starting point remains something from your own life that you want to talk through. Say it once, consider the question, and choose whether it deserves a place on your calendar.
FAQ
Can I connect any wearable to my calendar?
Connect a wearable only when its current documentation explicitly supports your calendar and account. A general description of planning or follow-through does not establish integration support.
Does Moonshot have a calendar connection?
Confirm calendar support in Moonshot’s current product documentation before authorizing an account. Its stated purpose is to hear you out, ask a good question back, and help you notice what your days keep saying.
What calendar permissions should I approve?
Approve only the permissions required by the documented workflow and understood by you. Distinguish reading calendar information from creating, changing, or deleting events.
How do I test a calendar connection safely?
Use one harmless event on a private test calendar with no guests. Review the proposal, approve it, and inspect the saved event before using the connection for real plans.
Will a calendar reminder invite the person I want to call?
A personal reminder does not need a guest. Leave the guest list empty unless you deliberately intend to send an invitation and have agreed on the meeting.
Can I use the workflow without connecting an account?
Yes: choose the next step and create the event yourself. Manual entry keeps calendar access separate while giving your decision a date and time.
Does creating an event prove that updates also work?
No: creation and updates are separate capabilities. Verify update support in the current documentation and test it privately before changing a real event.
One last thing
An empty guest list is not proof that an event is private. Other people can have access to the calendar itself, so check both the event’s guests and the calendar’s sharing settings.
The next step is yours before it is your calendar’s. Learn from your own life, choose what matters, and use the event to help you show up.